Dual Write Error “Failed to authenticate” and “Unable to get access token” from Tier1 Cloud-Hosted to Dynamics 365 Sales

Since Tier1 Cloud Hosted Environments (CHE) will be deprecated, there are still good reasons (๐Ÿ’ฐ) to use them anyway instead of UDEs. Tier1 CHE from withing Lifecycle Services can be paired with Power Platform environment including Dual Write Configuration with Dynamics 365 Sales. In the Tier1 configuration I’ve encountered an authentication error at creating new records in FO.

History and symptoms ๐Ÿค’

I’ve deployed a new Tier1 Dev/Test Environment 10.0.43 to the linked Azure Subscriptions. At the configuration dialog in LCS I’ve enabled Power Platform integration based on Dynamics 365 Sandbox. Deployment took a while but succeeded. ๐Ÿ‘

After the deployment I’ve restored a AxDB database with some basic configurations and performed a full database synchronization in Visual Studio. ๐Ÿ‘

Next I’ve linked the D365 Finance and Supply Chain machine with the deployed D365 Sales Sandbox environment from the LCS environment details page. Finally I’ve enabled the Dual Write Configuration also from the LCS environment details page. ๐Ÿ‘

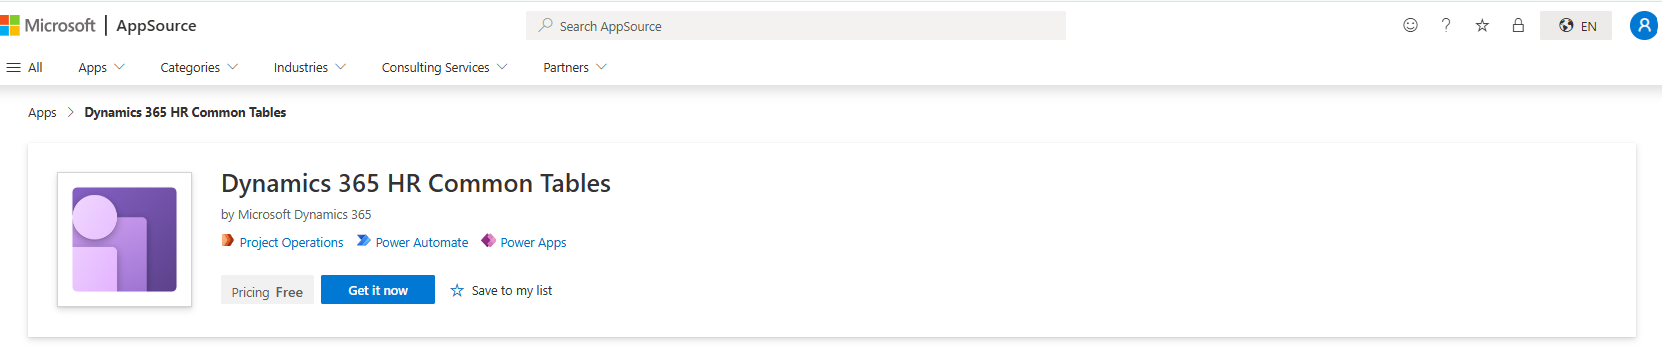
In Power Platform Admin Center, Environment, Dynamics 365 Apps two solutions were already deployed. Dynamics 365 Dual Write Core and Dynamics 365 Dual Write Application Core. Because the environment was a sales prototype I’ve added the Dynamics 365 Dual Write Human Resource, Dynamics 365 Dual Write Finance, Dynamics 365 HR Common Tables (!), Dynamics 365 Dual Write Global Address Book and Dynamics 365 Dual Write Supply Chain Solution from the App Source. ๐Ÿ‘

In Dynamics 365 Finance & Supply Chain at the Data Management Workspace I’ve imported the Core Solution and Supply Chain Solution. The table mappings have been populated successfully and I’ve choosen to synchronize only one legal entity (company) with Sales. ๐Ÿ‘

The basic table mappings (e.g. Legal Entities, Customer Groups, Currencies, Units, Size, Colors, etc.) including initial synchronization from FO to Sales were successful. I’ve also enabled synchronization between CustomersV3 and Accounts๐Ÿ‘

In Dynamics 365 Sales it was possible to create a new account from type customer, link it to the corresponding legal entity and assign a customer group. The customer account from Dynamics 365 Sales was successfully synchronized into FO within seconds and became a customer. ๐Ÿ‘

Vice versa, from Dynamics 365 Finance Supply Chain to Dynamics 365 Sales did not work. As soon as a new records in a synchronized table was create a Dual Write error message came up. No matter if it was a customer, product, etc. ๐Ÿคฌ

Unable to write data to entity accounts
Authentication failed with error
Failed to authenticate for https://__crm4.dynamics.com/api/data/v9.0/accounts
For information on troubleshooting see
https://go.microsoft.com/fwlink/?linkid=2244045
Unable to get access token 

Solution Step-by-Step

Microsoft has cut off CHE connections from accessing tenant information. I found some blog posts from other folks dealing with Business Events and a Microsoft documentation to setup Onebox environments. Following the instructions I’ve done the following:

App Registration

I’ve created an App Registration in EntraID. I’ve added the URL of the D365 FO Environment as response URL from type Web as well as the URL including /oauth

I gave API permissions to User.Read, User.Read.All, Dynamics ERP AX.FullAccess and LCS user_impersonation.

Self-Signed Certificate via PowerShell

Following the documentation I’ve create a simple self-signed certification via PowerShell on the Tier1 VM.

$cername = "myselfcert"

$cert = New-SelfSignedCertificate -Subject "CN=$certname" -CertStoreLocation "Cert:\CurrentUser\My" -KeyExportPolicy Exportable -KeySpec Signature -KeyLength 2048 -KeyAlgorithm RSA -HashAlgorithm SHA256

Export-Certificate -Cert $cert -FilePath "C:\Users\Admin051a5b362b\Desktop\$certname.cer"

Add to root-authorities

The export generates a .cer file. By double clicking the file you can install the file on the computer. I’ve done this twice. As local machine and choosen the place to be the root certificate authorities. The same with installation as user and also selected the installation to be placed in the root certificate authorities.

web.config and wif.config

The web.config file can be found at K:\AosService\WebRoot directory. I’ve made a copy before editing and changed the following lines. The spn: is the application ID from the app registration. The thumbprint can be found in the .cer file on the Details tab.

<add key="Aad.Realm" value="spn:<your application ID>" />
<add key="Infrastructure.S2SCertThumbprint" value="<certificate thumbprint>" />
<add key="GraphApi.GraphAPIServicePrincipalCert" value="<certificate thumbprint>" />

In the wif.config I’ve also added the application ID

<?xml version="1.0"?>
<system.identityModel>
  <identityConfiguration>
    <securityTokenHandlers>
      <securityTokenHandlerConfiguration>
        <audienceUris>
       <!-- WARNING: MUST be first element; updated at web role instance startup -->
          <add value="spn:00000015-0000-0000-c000-000000000000" />
          <add value="spn:MY_APP_ID_HERE" />

Application User in Dynamics 365 Power Platform

In the Power Platform Admin Center, on the environment page, under settings in groups users I’ve added an application user. I’ve assigned System Administrator Role like the already existing Finance and Operations Service account.

EntraID Application in FO

Finally to avoid any additional problems I’ve also create a new record in Dynamics 365 Finance Supply Chain at the EntraID Applications page.

Finally the synchronization from Dynamics 365 Finance Supply Chain to Dynamics 365 Sales was working. Customers, Products, Sales Orders, Invoices etc. can be created in FO and be found Sales. ๐Ÿ’š

Dual Write Installation error missing dependencies

Since the original Dual Write Orchestration packages has been replaced by a pack of smaller packages, its needed to setup the packages in the correct order. You can deploy a Power Platform environment using the Dynamics 365 template from within LCS.

Also from the Environment Full Details page, you can trigger the installation of Dual Write solution and initial configure the Dual Write solution. You will end up with Dual Write Core and Dual Write Application Core Solutions installed. To have the full Dual Write Experience you have to install the other Packages as well.

Dynamics 365 Dual Write Packages from App Source

You might run into an installation error when deploying Dual-Write packages from App Source.

Error details
How to troubleshoot
To fix this problem retry installation. For directions on how to do this see here.

msdyn_Dynamics365SupplyChainExtendedAnchor
NotProvided
Solution manifest import: FAILURE: The following solution cannot be imported: Dynamics365SupplyChainExtended. Some dependencies are missing. The missing dependencies are : <MissingDependencies><MissingDependency canResolveMissingDependency="True"><Required type="1" schemaName="cdm_worker" displayName="Worker" solution="HCMCommon (2.2.0.3)" /><Dependent type="10" schemaName="msdyn_transferorder_receivingcontactpersonnel" displayName="msdyn_transferorder_receivingcontactpersonnel" parentSchemaName="cdm_worker" parentDisplayName="Worker" /></MissingDependency></MissingDependencies> , ProductUpdatesOnly : False
Dual Write installation error, dependencies Worker missing

There is also an additional required package that is not labeled “Dual Write” but required, the Dynamics 365 HR Common Tables package:

Dynamics 365 HR Common Tables solution required for Dual Write

Here is an order of installation that worked for me (Apr. 2025)

  • Dual Write Human Resource solution
  • Dual Write Finance Solution
  • Dynamics 365 HR Common Tables
  • Dual Write Global Address Book
  • Dual Write Supply Chain

Extend Dynamics 365 Dual Write Solution

Dual Write is a Power Platform based solution to synchronize Dynamics 365 Finance and Supply Chain with Dynamics 365 Customer Engagement in real time. I’ve uploaded a Youtube Video that shows Dual Write in Action. The default solution comes with a set of synchronization entities like Products, Customers, Vendors, Quotations, Sales Orders and Invoices. In a Dynamics 365 project you typically need to add additional information in both applications.

In this example a customer shall have a preferred carrier. The carrier (e.g. UPS, DHL) will be stored in a main table. The customer entity will have a reference to set the carrier. The corresponding account entity in Dynamics 365 Sales will have the same lookup field and preferred carrier settings will be synchronized between Finance and Sales.

Carrier in Dynamics 365 Finance and Supply Chain Management

Extend Dynamics 365 Finance / SCM Data Model

For Dynamics 365 Finance / SCM create the necessary artifacts in Visual Studio:

  • A carrier table with a mandatory Name and Description field. Also create a primary index based on the Name.
  • An entity to make the carrier table accessible from external applications.
  • An extension of the CustTable with a Carrier field and a table reference from the CustTable to the Carrier table.
Dynamics 365 Finance / SCM Solution for customers preferred carrier

Save, compile and create a deployable package. Upload the package to your projects LCS asset library. After the package was validated, deploy the package to your target environment. After the package was deployed, go to Data Management Workspace > Framework Parameters > Entity settings and refresh the entity list.

Extend Dataverse (aka. Common Data Service) Entities

Navigate to https://make.powerapps.com and switch to your target environment. Go to Data > Tables and create a new table for the carrier. The table shall match the carrier table in Dynamics 365 FO. Make the Name field as mandatory primary field and add a second optional text field for the Description. Add a lookup field to the existing company table to match the DataAreaId that will come from Dynamics 365 Finance. Note that PowerApps will add a lot of other fields like owner, created, etc. as well.

Create a carrier entity in the Dataverse (CDS)

Find the account entity that was created by the Dual Write solution. Add an addition lookup field called Carrier that references the newly created carrier table.

Carrier lookup in the account entity

Customize the accounts form in Dynamics 365 sales

In PowerApps > Data go the accounts table and switch to the forms tab. There go to the Main form that is used in Dynamics 365 Sales to work with accounts. Click on the Name of the form, this will open the forms designer.

Dynamics 365 Dataverse Account entity

In the PowerApps designer add the Carrier field to the form. Save the change and publish the customized form.

Add carrier to Dynamics 365 Sales Account Form

Map the Carrier Entity from Dynamics 365 Finance to the Carrier table in Sales

In Dynamics 365 Finance open the Data Management Workspace and go to Dual Write. Create a new table mapping. Map the Carrier entity from Dynamics 365 FO with the Carrier table form the Dataverse.

Create a new table mapping in Dynamics 365 Dual Write

Next map the Carrier Name fields and the Carrier Description fields. Save and start the initial synchronization.

Map Dynamics 365 FO entity to Dynamics 365 Sales table

Check if the synchronization was successful. Open https://make.powerapps.com in a browser and switch to your target environment. At the left menu go to Data > Tables. Click on the Carrier table and switch to the Data tab. You should see the same carrier like in Dynamics 365 Finance.

Add the Carrier Lookup field to CustomverV3 mapping

Stop the synchronization of the CustomerV3 to account. Go to table mappings and refresh the tables. This will load the table schema from the Dataverse with the new carrier lookup field. Create a new mapping from the Carrier in Finance to the Carrier field in Dataverses entity. Save the mapping definition as a new version. Restart the synchronization and make sure there are no errors.

Mapping carrier fields in Dual Write

Now you should see and edit the Carrier in Dynamics 365 Finance as well in Dynamics 365 Sales. Changes made in any of the two products will be synchronized.

Preferred Carrier field in Dynamics 365 Finance and Supply Chain Management
Mapped and synchronized Carrier field in Dynamics 365 Sales

Limitations

Dual Write has some limitations regarding the number of lookup fields. If you come across an error during the synchronization you may need to remove some of the lookup fields from the Dual Write table mapping.