Object Detection with PowerApps AI Builder
26. August 2019 1 Comment
Power Apps recently got the capability to create some computer vision AI models. One of the IMHO most popular ones is called object detection, which is used to detect (predefined) objects on images. For getting started you may use the free edtion of power apps.
Environment and CDM Entity
AI Builder is bound to a Power Apps environment and the Common Data Model. If you don’t have already created an environment, logon to https://web.powerapps.com and create a new environment.

To use the CDM entities you need a new database. In my case, I created a new one with USD and English as preferred language.

It may take a while, and you may need to refersh your browser screen, but the AI Builder (Preview) option will appear on the left menu bar.

Next, go to Data > Entites and create a new entity for the type of objects you want to identify. In my case, I’m playing around with Nerf guns, therefore I created a new Nerfgun entity. It requires at least a useful name. Feel free to add more fields.

Provide entity data
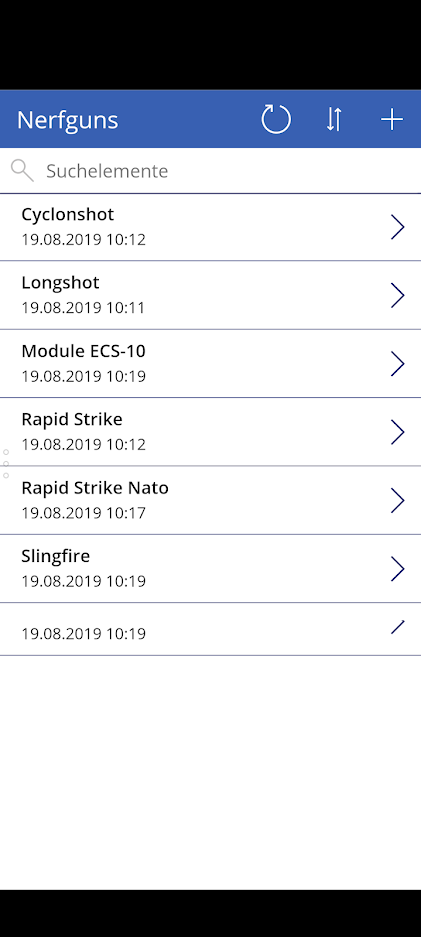
In a next step you have to provide information about the different elements that shall be identified. In my cases, which Nerfs guns will be on fotos e.g. Rapidstrike, Slingfire, Cyclonshot, etc.

There is an option to edit the entity via Excel. However, in my case the Excel addin is not working, and failing to authenticated 😦 If this happens to you, a workaround is to create a simple Power App and edit the entity via Power App.
Create and train AI model
In Power Apps go to AI Builder and create a new model for object detection.

Provide a name for the model and select the created entity for detection. From the records in the entity select those records that are relevant for detection.

Next comes the time consuming part, take pictures of your objects in different locations, lighting, quality, day time, etc. upload it to the power apps model. You need at least 15 pictures for each element you want to detect.

Tag each of the pictures with the corresponding object on the picture.

After uploading and tagging each picture, train the model. This may take a while and will result in a (not very usefull) quality estimation. Right now I didn’t see recall, precision, AUC, or any other more detailed information. If you are satisfied with the models estimated power, publish it so it can be used in your apps.

Use AI model in Power Apps
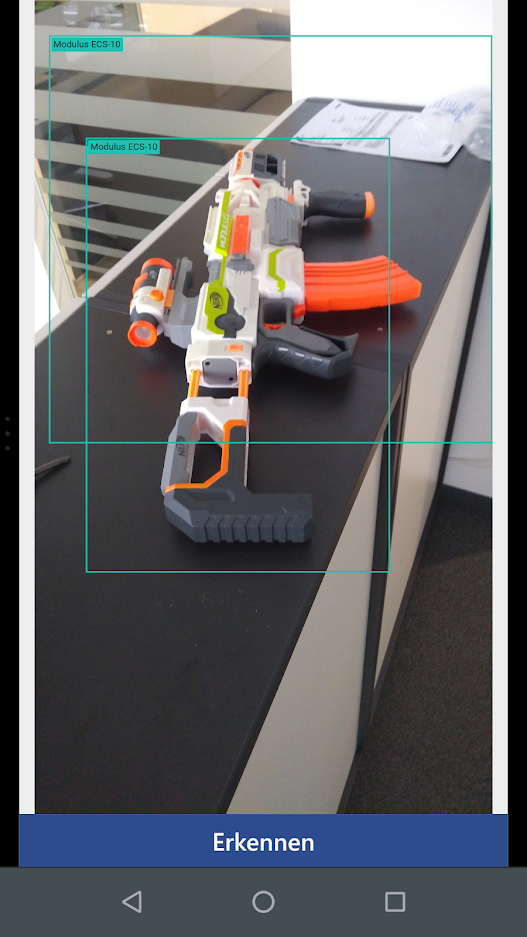
It’s easy to use the trained model in a Power Apps application e.g. on the smart phone. Create a new power app with empty layout. From the menu insert the object detection component.

Select your object detection model for the component. Save and publish your app, load it on your phone and test it.


Nicely explained. Thanks for sharing with us. https://ashutoshtripathi.com/